 In-season training is one of the most misunderstood aspects of athlete development. Usually there are two sides of the coin when it comes to the mishandling of how to go about continuing progress during the season. The first group of athletes and coaches simply stop training all together or are afraid to continue any type of intense training. The other group of athletes and coaches never take their foot off the gas and end up wearing themselves down, which ultimately can stunt development and progress, hurt in-game performance or even lead to injury. Proper in-season training can go a long way in furthering development that was achieved during the off-season and preserving gains made over the course of the prior six months of training. It can also help prevent injuries and improve on-field performance! When it comes to in-season training you can vastly improve the effectiveness of your programming by understanding submaximal maintenance training and flexibility with your programming, the use of concentric only exercises and using high repetitions to promote much needed recovery!
Submaximal Training and Programming Flexibility Before you begin to understand submaximal training you must first grasp the basic fundamentals of programming flexibility. Essentially, you need to have a good feel for your body and be mindful of your in-season schedule in order to adapt your program to fit your needs. For example, you may find that weather may change your game schedule during a baseball season. You must have options of varying intensities in your programming so that you can properly adjust. If you are feeling good and have an easier week of games (for any reason), you can increase the intensity of your training so that you can still make some gains and further your development. Remember, just because you are in-season does not mean you cannot further improve on attributes you gained in the off-season. With that being said, here is a quick breakdown of a method you can use to approach your loads and intensities while you are aiming to maintain, and then how you can have some flexibility in light of opportunities to up the intensity to off-season levels. I normally keep my athletes in the 70-90/95% range of their one rep max (1RM), while they are in-season. Essentially, the only time they will work towards 90/95% of their off-season 1RM is if they are only performing one-repetition sets. I feel that the 70-85% range coupled with anywhere from 2-5 repetitions is a perfect place to maintain (and even gain) strength. Once you have this is mind it is easy to see how you can be flexible in adjusting your volume and load percentages. For example, let’s take a high school baseball player who is performing two “in-season,” training day’s per-week. This athlete’s primary lower body movement is the squat, and he maxed out at 265 pounds at the end of the off-season. Let’s create a sample situation where the general program called for three repetition sets of 80% of his 1RM, but he had an easy week due to miscellaneous cancellations and scheduling complications. An adjustment to that set program would look as follows:
You can see how easy it is to adjust your intensity to take advantage of lighter weeks you may get throughout the season! Take advantage of these opportunities and adjust! Making The Most of a Prowler Sled (Concentric only exercises) I will keep this short and sweet (I promise I will try). Muscle fibers predominantly tear during eccentric portions of a range of motion. That is, the lowering of the weight where you are controlling a load or resistance is what promotes muscle fiber tears and hypertrophy. With that in mind, concentric (part of the range of motion where you are moving into extension like the pressing in a bench press or upward movement in a squat) only movements are a great way to preserve strength, but limit eccentric stresses that can cause soreness. This is key when we are in the thick of a season and we do not want to place extra stresses on our muscles. In addition, concentric only movements help us maintain much of the strength we built in the off-season. In light of this, the prowler sled is your best friend. Almost all activities done with a sled do not incorporate an eccentric load on the body. Sled pushes work your legs, but only through extension, sled rows do the same and just about any other variation can be thought of in order to preserve strength and limit muscular soreness. Using High Repetitions to Promote Recovery Lastly, I will generally make one of my suggested two-day in-season training days repetition based. Higher repetition sets at lower intensities (think of a 15 rep set with a weight you could do for 30 reps) are great to promote blood flow and recovery for an in-season athlete who may very well need this. A great way to treat recovery based repetition lifts is to perform them in a 65-75% intensity (window for aerobic recovery). In addition you can also treat the higher repetition based lifts with the same mentality as your heavier day. IT IS OK to push it just a bit if you are feeling great and have a lighter schedule that week. Go ahead and use these tools to ensure that your in-season training is effective and even result yielding as tool to send you into the next off-season with a head start on your competition!
1 Comment
 Over the past couple of months I have made great use of yielding isometrics in my programming for my athletes. In doing so, I have developed some great strategies (in my opinion) on how to utilize these particular movements as accessories in your programming that can help pack on some much desired muscle (along with some strength)! Here is a quick and easy to understand breakdown of yielding isometrics along with some practical ways to implement them in your programming.
What are Yielding Isometrics? So already in this article I have mentioned that yielding isometrics are a great tool to use to build muscle mass. With that being said, this gives us a great clue as to what is occurring during yielding isometrics that helps build muscle mass. As many of us know, a major component involved in the creation of muscle mass is the tearing of muscle fibers (myofibril hypertrophy). During myofibril hypertrophy contractile proteins also increase so you will also see some strength gains as well! This differs from sarcoplasmic hypertrophy (the result of high repetition bodybuilding style sets) in which non-contractile fluid, sarcoplasm, increases in volume. This is the “pump,” effect many bodybuilders refer to and is also the reason you can be massive and not have strength relative to your size! Now, what sounds more appealing to an athlete? Functional muscle mass that correlates to strength gains or “show,” muscle that does not actually provide much of a performance benefit? Assuming that you want functional muscle mass, Yielding Isometrics are for you. Essentially, yielding isometrics involve resisting forces that are trying to pull you back through the range of motion you are performing. For example, the banded terminal knee extension exercise being performed here. The athlete moves through the full range of motion and then attempts to hold that position as the band is trying to pull him back through. Basically, you are resisting eccentric forces (remember that eccentrics cause muscle fiber tearing), and thus working myofibril hypertrophy. How to Implement Yielding Isometrics Before I delve into specifics on how you can pair these with certain exercises in your programming, here is one basic principal I like to use with yielding isometrics. I stick to general principles of hypertrophy and aim to keep time under tension (total amount of time a muscle is contracted during a set) to 30-50 seconds. You can begin with 30 seconds and gradually work your way up to 50 as you progress through your program. My two favorite ways to implement Yielding isometrics in my programming thus far are as a second exercise in a superset that targets the same muscle groups as the first exercise or as the second exercise in a superset to accompany a concentric only movement.
Now that you understand yielding isometrics you can utilize them and maximize the efficiency and effectiveness of your programming! Give them a try and notice immediate gains in muscle mass as well as strength! How a Coordinated Relationship Between Your PT and Strength Coach Can Benefit Your Training2/23/2018  Last week my colleague Dr. Anthony Falco discussed how you could see a physical therapist without having to see a doctor first. Doing so can save you a significant amount of money in your process to heal your ailments. With that being said, I want to take the time this week to touch on the importance of a strong symbiotic relationship between your physical therapist and strength trainer. A strong relationship between your physical therapist and strength trainer can not only help limit the severity of a training related injury, but can also lessen the length of time for recovery and also help correct injuries or performance inhibited by movement dysfunction.
Limiting The Severity of an Injury One of the most common issues I have seen in the strength and conditioning field is related to lingering injuries that are never properly addressed. One of the main benefits I have seen come from sharing clients with my affiliates at Performance Physical Therapy is limiting not only the severity of an injury, but also being more efficient in recovery time. In most cases, a strength coach could further aggravate a healing ailment because they are not sure of what’s causing it. For example, a rotational athlete (such as a baseball player) could be dealing with a hip injury being caused by a misalignment of the pelvis that often comes from rotational movements such as throwing and hitting. If this athlete is either not seeing a physical therapist or that therapist isn’t in contact with their strength coach a significant furthering of that injury can occur. Instead of having a physical therapist diagnose and correct the hip alignment issue, time could be spent stretching what feels like a “tight,” hip flexor which will further exacerbate the injury. Working alongside a physical therapist cannot only limit the severity of an injury, but also decrease the amount of time spent recovering from a particular injury. Limiting Injury/Maximizing Performance Via Correcting Movement Dysfunction Another benefit I have seen from working alongside a physical therapist lies in preventing injuries before they occur or even improving sports performance via correcting movement issues. One of the biggest responsibilities of a strength coach relates to improving the movements of athletes and general clients. Sharing clients with a physical therapist can help with correcting movement issues related to particular muscular dysfunction and also help with exercises and modalities used to fix these issues. Are your strength coach/trainer and physical therapist on the same page? Do they work together to ensure your health or nagging injuries are treated in the best way possible? If not, work with the team of Performance Physical Therapy and Challenger Strength and see how our concerted effort can best help your health and performance. Did you know you can come to see a physical therapist without having to see your doctor first?2/23/2018 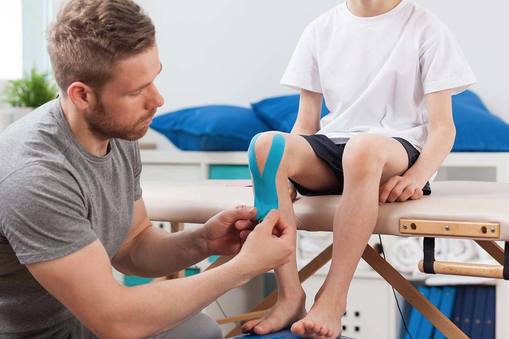 In New Jersey you have direct access to your physical therapist. This means that a physician referral or prescription is not required to see your physical therapist. If you have back pain after shoveling the driveway or a stiff neck from sleeping on a different mattress while traveling, you can come in to see your physical therapist without having to go see your doctor. In addition to painful conditions if you want to improve your balance, improve your range of motion and strength, or start a new exercise program your physical therapist can help with that too!
Being able to come see your physical therapist directly has multiple benefits. The first benefit is decreased time to starting care for your condition. Often with painful conditions the sooner you get into physical therapy the easier it is to resolve the symptoms and eliminate the pain. When symptoms become chronic it can take longer for all forms of treatment to help decrease those symptoms. Second, by seeing your physical therapist first you can choose conservative, non-pharmacologic care as the first treatment for your condition. The opioid crisis is real and all medications carry some risk of side-effects. Physical therapy is an extremely safe option to treat pain. Third, if a physical therapist thinks you need further evaluation is required, we have great relationships with the best doctors in the area and can connect you with the right physician for your problem-generally without a long wait!. Finally seeing your physical therapist directly can save you time and money. By getting PT first you can avoid having to schedule a visit and wait at the doctor’s office, pay a doctor’s co-pay or deductible just for the doctor to send you to your physical therapy anyway. Physical therapists are experts in the neurological and musculoskeletal systems. We are trained to screen patients that are appropriate for physical therapy treatment and how to identify patterns of signs and symptoms that warrant further medical attention. Will my insurance cover my care without a referral from my doctor? Every insurance company is different. Many major plans will pay for physical therapy without a referral. When scheduling your first visit at our offices we will take your insurance information and verify your benefits to determine what your responsibility is and if your insurance company will require a referral or prescription from your doctor. The direct access physical therapy law in New Jersey: The direct access law in New Jersey states that patients can see their physical therapist without a referral. It also states that at 30 days from the start of care, the patients doctor should be updated regarding the plan of care, or if the patient is not making reasonable progress that the patient be referred back to their doctor. The law also states that during the initial evaluation if the physical therapist feels that patient is not appropriate for physical therapy treatment or further testing is required (x-ray, MRI, or blood work as examples) the physical therapist will refer to patient to the appropriate healthcare provider. Dr. Anthony Falco Sources: http://www.apta.org/uploadedFiles/APTAorg/Advocacy/State/Issues/Direct_Access/DirectAccessbyState.pdf http://www.apta.org/StateIssues/DirectAccess/FAQs/ 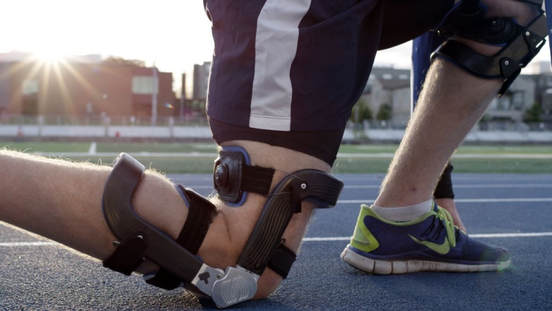 Last week, Dr. Anthony Falco discussed the role of the meniscus in the knee and when you should consider getting surgery to repair a meniscus tear. This week, I will discuss some things you should implement into your training program following knee surgery and how you can further progress after you have completed working with your physical therapist following surgery. Following any knee surgery it is imperative to build back adequate muscle mass in the quadriceps, re-establish proper landing mechanics and force absorption of ground forces during high power activities and solidify sprinting mechanics.
Eccentric focused exercises are your best friends After knee surgery it is common to experience atrophy (diminished muscle mass) of the quadriceps of the repaired leg. While your physical therapist more than likely focused on building back lost mass, it is imperative to continue this focus once you have moved on to strength and speed training. While I have no problem with seated leg extensions early on in the rehabilitation process, I believe other alternatives should be utilized in strength training protocol. Essentially, seated leg extensions limit activity of the hamstring while the quadriceps is contracting. This never really happens in sports. So, I prefer the terminal knee extension (TKE), as a quadriceps building exercise that allows the hamstring to work in addition to the quadriceps. Basically, anchor a band and place it around your knee. Slightly flex your knee forward before pulling it back into extension and contracting your quadriceps. While many other quadriceps dominant movements can be performed to build muscle mass (lunges, split squats etc.), here are my general hypertrophy guidelines to follow:
Absorbing forces, re-conditioning tendons and ligaments and sprinting technique While building mass back in the quadriceps you should also focus on re-introducing your tendons and ligaments to power movements such as jumping and sprinting. It is important not to jump right in to high intensity jumps and sprints as your body may not be ready to handle the demand places on the knee and surrounding areas. Extensive Plyometrics Extensive plyometrics are lower intensity jumps that are essentially “hypertrophy for jumping.” Meaning, they rid of use of the stretch shortening cycle (reactive stretch reflex of the ligaments and tendons involved in maximum intensity jumping and sprinting). We accomplish this by implementing pauses or performing short rhythmic jumps. The main goal is to re-condition the tendons and ligaments and prepare them to handle higher intensities. Also, it teaches them how to behave again so performance is maximized later on. During these exercises the focus should be on sound and clean landing mechanics. Here is what you should look for:
Low Intensity Sprinting Start Types Lastly, it is extremely important to reaffirm good sprinting technique while not exposing an athlete to sprinting variations that produce too much power. That is, low start types (push-up, mountain climber, etc.) or start types that involve excess power building via medicine ball throws.
Overall, it is important to progress through movements with a plan once an athlete has moved through a full rehabilitation program and can begin training! Gerry DeFilippo 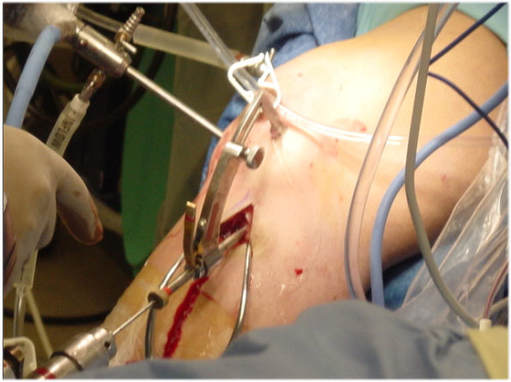 The meniscus is a structure in our knee joint that provides smooth joint motion, shock absorption, joint stability, and nutrition to our knee joint. Each knee has a medial meniscus and a lateral meniscus. Together the medial and lateral menisci also enhance stability of the knee joint. They sit on top of our tibia (shin bone) and create a concave surface for the end of the femur to fit into, think of a golf ball on top of a tee - the menisci are like to lip of the tee that keep the ball in place.
As you can see below (link to image at bottom of article) the medial meniscus is larger and half circle shape and the lateral meniscus is smaller and more circular. The medial meniscus is more firmly attached to the surface of the tibia by ligaments compared to the lateral meniscus. The decreased mobility of the medial meniscus makes it more susceptible to injury. Both menisci receive blood flow to the outer edges however further towards the center of the knee joint the blood flow becomes poor. This is an important point as any meniscal injury on the outer edge with good blood flow is more likely to heal than an injury on the inner edge with poor blood flow. The portion of the meniscus that does not receive good blood flow receives its nutrition through the lubricating fluid in the joint called synovial fluid. Movement and exercise are essential to deliver nutrition to the menisci. There are also nerve endings that run to each meniscus. Some of these nerve endings provide sensation and others are mechanoreceptors that tell out brain how much pressure is on our knee and what position our knee is in. Meniscal tears are a common injury. They can be traumatic - like twisting a knee during a sport. They can also be non-traumatic or degenerative meaning that over time the meniscus starts to get worn out. Clinical examination including a detailed history and physical exam by a physician or physical therapist can be very accurate at identifying a meniscus problem. Sometimes an MRI may be done to visualize a tear and identify the size, type, and location of the tear. When a diagnosis of a meniscus tear is made there are options for treatment. Two common options are arthroscopic surgery or conservative management. Over the past 20 years the use of arthroscopic surgery to treat meniscal tears has expanded significantly. Specifically in the case of adults with degenerative (non-traumatic tears) the rates of surgery have gone through the roof. Unfortunately many studies have identified little to no advantage to this type of surgery for treating these types of meniscus tears. Conservative management, including exercise, is much less expensive and invasive and has no negative side effects has been shown to be better or equally as effective as surgery in some studies! Here at Performance Physical Therapy & Sports Conditioning we specialize in treating pain, identifying problem areas to address, and designing an individualized treatment plan to address those problem areas. In the case of a meniscus tear, strength, flexibility, balance, joint mobility, and function are all thoroughly assessed. A combination of mobility exercises, strengthening exercises, and manual therapy can be customized to treat a meniscus tear effectively and efficiently. If you are having knee pain or have been diagnosed with a meniscus tear, give us a call! Don’t rush out and have an arthroscopic meniscectomy if you have not seen us first. Based on the latest science conservative management with manual therapy and exercise should be the first line treatment for meniscal tears and surgery should be the last resort. Next week Coach Gerry will discuss his approach to starting a strength training program with a client who has been discharged from physical therapy following a knee injury or surgery. Dr. Anthony Falco Fox AJ, Bedi A, Rodeo SA. The basic science of human knee menisci: structure, composition, and function. Sports Health. 2012 Jul;4(4):340-51. Muheim LLS, Senn O, Früh M, Reich O, Rosemann T, Neuner-Jehle SM. Inappropriate use of arthroscopic meniscal surgery in degenerative knee disease. Acta Orthop. 2017 Oct;88(5):550-555. Azam M, Shenoy R. The Role of Arthroscopic Partial Meniscectomy in the Management of Degenerative Meniscus Tears: A Review of the Recent Literature. Open Orthop J. 2016 Dec 30;10:797-804. Kise NJ, Risberg MA, Stensrud S, Ranstam J, Engebretsen L, Roos EM. Exercise therapy versus arthroscopic partial meniscectomy for degenerative meniscal tear in middle aged patients: randomised controlled trial with two year follow-up. BMJ. 2016 Jul 20;354:i3740. doi: 10.1136/bmj.i3740. PubMed PMID: 27440192 Swart NM, van Oudenaarde K, Reijnierse M, Nelissen RG, Verhaar JA, Bierma-Zeinstra SM, Luijsterburg PA. Effectiveness of exercise therapy for meniscal lesions in adults: A systematic review and meta-analysis. J Sci Med Sport. 2016 Dec;19(12):990-998. doi: 10.1016/j.jsams.2016.04.003. Epub 2016 Apr 20. Review. PubMed PMID: 27129638. Knee Image: http://www.vangsnessmd.com/wp-content/uploads/2015/02/proc_img_meniscal01.jpg  Last week, Dr. Anthony Falco discussed the basics of heart rate training and how to properly calculate your resting heart rate and maximum heart rate. Once you determine these numbers you can properly utilize heart rate monitors to enhance your training. In athletes, this can be tremendously useful, as it will allow them to better determine if their aerobic training is focused on recovery, maintenance, or aerobic improvement. For the sake of this article, we will be focusing on aerobic improvement. To improve an athlete’s aerobic capacity you must understand the percentage of maximum heart rate needed to reach the improvement threshold and also how to use exercises which best work towards achieving that same goal. Proper Heart Rate Percentage For Aerobic Improvement In the past I discussed using the aerobic capacity system to help aide in recovery for athletes. For recovery, it is best to work in a 60-75% range of the athlete’s max heart rate. However, the range for aerobic improvement goes as high as 85-90% of the max heart rate. Basically, apply Dr. Falco’s formula for your maximum heart to these percentages and you can find the best threshold for an athlete to work in to improve aerobic capacity. For example:
How To Construct A Proper Movement Pattern Aerobic Program As I previously mentioned, the movement patterns are great to use for aerobic improvement for a number of reasons. In addition to helping improve an athlete’s working capacity, you can also use this as extra time to drill home proper form with the main movements. However, it is extremely important to note that an athlete must show proficiency in these movements prior to using them, as it is never ideal to learn a new skill or movement in a fatigued state. For example, an athlete who cannot perform a proper bodyweight squat should not be allowed to use this movement in an aerobic circuit as they will be susceptible to not only injury, but can further program their nervous system to perform the movement incorrectly.
The most important thing to remember here is that you can find success with a multitude of different methods. Once you have determined your proper heart rate the main goal is simply stay in that zone and maximize your aerobic capacity. Movement pattern circuits are simply a great alternative to use because they can further solidify the proper form and technique of the most important qualities and movements for an athlete. Gerry DeFilippo  The start of a new year is often a time when people will start a new fitness or health goal. One important factor that aids in meeting goals is having a way to measure progress. Heart rate can be a simple metric to help measure progress of a fitness program and can serve as an indicator of cardiovascular health. Tracking heart rate can be as simple as finding your pulse in your neck (carotid artery) or wrist (the radial artery) and using a stopwatch. Count the number of beats for one full minute or count the number of beats in 10 seconds and multiply by 6 for an estimate. The old fashioned way works great but today fitness trackers, fitbits, heart rate monitors, even apps on our phones can help measure our heart rate. Here are 3 ways that heart rate can be utilized to keep you on track for your fitness goals: 1 - Measure heart rate recovery 1, 2 -Heart rate recovery is defined as how long it takes your heart rate to return to baseline following a bout of exercise. This is a measure of how well your nervous system regulates your heart. -Perform a baseline workout - walk for 20 minutes, run 2 miles, take a spin class. Pick something that can be repeated after a few months of training. -Following exercise rest quietly for 1 minute and then take your heart rate and take it again each minute until it returns to your resting heart rate. -At one minute heart rate should decrease by 12 beats per minute or greater. 2 - Calculate your target training zone. Here is a link with a calculator for target heart rate: http://www.ottawarun.com/heartrate.htm As an example: A 40 year old with a resting heart rate of 70 beats per minute wants to train between 70 and 80% of his max heart rate. 220-40 = 180 (max HR) 180 (max HR) - 70 (resting HR)= 110 110 x .7 = 77 + 70 = 147 110 x .8 = 88 + 70 = 158 Target training zone using = 147 to 158 beats per minute. This calculation is based on age and resting heart rate to determine an appropriate training zone to improve aerobic capacity. This method known as the “Karvonen Formula” is a simple estimate that is correlated to VO2 max which is considered the gold standard measurement of aerobic capacity. The American Heart Association makes recommendations for amount of exercise. For moderate intensity 50-70% of max heart rate and vigorous intensity 70-85%. Keep track of the amount of time you spend exercising in the target zone! If you have any previous heart conditions or issues consult with your doctor or physical therapist before starting any new exercise program. If you have questions or want to learn more about how to start a new exercise program we can help with that too! If we can help you conquer any barriers that prevent you from reaching your fitness and health goals come see us! Check in next week and Gerry from Challenger Strength will share is insight on how he helps his athletes and clients improve their cardiovascular fitness. Sources: 1 - Cole CR, Blackstone EH, Pashkow FJ, Snader CE, Lauer MS. Heart-rate recovery immediately after exercise as a predictor of mortality. N Engl J Med. 1999 Oct 28;341(18):1351-7. 2 - Jolly MA, Brennan DM, Cho L. Impact of exercise on heart rate recovery. Circulation. 2011 Oct 4;124(14):1520-6. doi: 10.1161/CIRCULATIONAHA.110.005009. Epub 2011 Sep 26. 3-https://www.mayoclinic.org/healthy-lifestyle/fitness/in-depth/exercise-intensity/art-20046887?pg= 2 Infographic: http://www.heart.org/HEARTORG/HealthyLiving/PhysicalActivity/FitnessBasics/American-Heart-Association-Recommendations-for-Physical-Activity-in-Adults_UCM_307976_Article.jsp#.Wk0Syt-nGM8 Dr. Anthony Falco  Last week, Dr. Anthony Falco discussed how you can decipher the differences between pain and soreness, and when it may be appropriate to see a physician. This week I want to give some strategies that can be used in order to deal with muscle soreness and promote recovery after high intensity bouts of physical activity. Essentially, you now know you do not need to see a physician, so what is next? Once I give you a full breakdown of what makes cardio recovery focused I will give some methods you can use in your own programming.
The Different Energy Systems of The Body Essentially, there are three main energy systems:
For the sake of this discussion we are going to focus on the aerobic (oxidative) energy system as a means of promoting recovery. While the aerobic energy system is utilized to promote recovery between bouts of anaerobic (alactic) activity, we are going to focus on its role in recovery and assistance in dealing with soreness/fatigue. With this being said, it is essential to perform training in a range of 60-75% of your max heart rate (220-age). This range will ensure you are aiming to stimulate the recovery process. How To Perform Aerobic Recovery Training As I mentioned, it is imperative to ensure that you are performing lower intensity bouts that have longer durations when trying to recover. This can be done in a multitude of ways.
The important thing to remember when utilizing the aerobic energy system for recovery is to be cognizant of the intensities. Recovery can only occur if the work being performed is done in a 60-75% window of intensity.  Like many sports, baseball puts asymmetrical loads on the body. In all aspects of baseball (pitching, fielding, batting, base running) the rules of the game and right or left hand dominance influence how the body takes on the physical stress of the sport.
The core is essential for generating and transferring force during the powerful and asymmetrical movements that take place in baseball. For the purpose of this discussion we are going to define the core as: the abdominals, the erectors (muscles that run parallel to the spine), the pelvic floor, and the hips (the glutes, groin muscles, and hip flexor muscles). When throwing a pitch, the core muscles maintain stability of the the low back and hips allowing force generated through the legs to be transferred through the core to shoulder complex and ultimately to the ball. This transfer of force takes place in less than 0.2 seconds!1 The core is essential to maintaining proper mechanics through all phases of delivering a pitch. Any imbalances in flexibility, strength, or coordination at that high rate of speed can lead to decreased performance and injury. If we focus specifically at the hips as a key point connecting the powerful leg muscles to the core we find a potential area for injury and dysfunction in the pitching athlete. Up to 5% of all injuries in minor and major leaguers are due to hip problems.2 Although difficult to estimate, it could be hypothesized that other injuries to the shoulder or elbow might be avoided if function is maximized at the hip and core. Let’s forget about the steroid era in baseball for a moment and recall the crazy workouts of Roger Clemens. Sure, he focused on strengthening his arm and rotator cuff, but the main focus of his off-season training was strengthening his hips and core. When a hip injury in a baseball athlete does occur, physical therapy is generally the best way to treat it. The treatment of hip injuries in pitchers begins with a detailed assessment and evaluation. This includes looking at spine and hip range of motion, flexibility, soft tissue quality, strength, endurance and pitching mechanics. Treatment for these types of injuries is highly individualized depending on the specific presentation of each athlete. The four main elements we focus on when treating hip pain in a pitcher include: manual therapy, hip mobility, core stability and pitching mechanics. Let’s break each of these down: 1 - Manual therapy - This includes mobilization, manipulation, or muscle energy techniques to the hip and/or low back and pelvis complex to restore normal mobility, decrease pain, and improve muscle performance. Manual treatment can also include instrument assisted soft tissue mobilization and soft tissue techniques to relax spastic muscles, improve soft tissue mobility, and restore muscle flexibility. 2 - Hip Mobility - These are drills and exercises to restore full range of motion and flexibility to the hips. Some examples include adductor stretching, hip flexor stretching, and deep lunges for an active stretch to the hip flexors. 3 - Core Stability - These exercises are used to maintain integrity of the low back and pelvis complex and can include double and single leg bridges, glute activation drills, lunges, planks, crawling, ab roll outs, and single leg balance and stability exercises. 4 - Pitching Mechanics - Breaking down the pitching delivery step by step and practicing proper mechanics that build on the range of motion, mobility, and stability gained in the first three elements through a focused rehabilitation program. Recently at Performance Physical Therapy we had a patient who is a left handed pitcher with hip pain. He presented with complaints of a right hip pain that bothered him the most during his stride to deliver the ball to the plate. His history revealed no trauma or recollection of injury-just an onset of pain with throwing. On examination, serious hip pathology was ruled out through a detailed history and an in-depth orthopedic exam. There was significant tenderness to the touch over the hip flexor muscle and its attachment to the front of the hip bone, pain with stretch to the hip flexor muscle, and pain that was reproduced with contraction of the hip flexor. We also identified limited flexibility of the groin and hamstring muscle groups and weakness of the hip, glute and core. To treat this patient we utilized manual therapy targeting the low back and pelvis, hip joint and hip flexor muscles, hip mobility exercises, core stability work, and a review of his pitching mechanics. With only a few sessions of physical therapy and some activity modification, our patient did not miss a single day of baseball practice or strength training with Challenger Strength and made a full return to pitching in less than 2 weeks. Early identification of the injury and a smart selection of treatment techniques was the key to such a quick recovery. Be on the lookout for a post from Gerry DeFilippo at Challenger Strength next week demonstrating some great ways to further develop core, rotational strength and power that helps prevent hip injuries and improve performance! Interested in what what we do and how we achieve our results? Stop by one of our two locations in Wayne, give us a call at 973.368.4907, email us at staff@performancePTSC.com or follow us on social media to see how we can help you! Dr. Anthony Falco References: 1 - Seroyer ST, Nho SJ, Bach BR, Bush-Joseph CA, Nicholson GP, Romeo AA. The kinetic chain in overhand pitching: its potential role for performance enhancement and injury prevention. Sports Health. 2010 Mar;2(2):135-46. 2 - Coleman SH, Mayer SW, Tyson JJ, Pollack KM, Curriero FC. The Epidemiology of Hip and Groin Injuries in Professional Baseball Players. Am J Orthop (Belle Mead NJ). 2016 Mar-Apr;45(3):168-75. |
AuthorSGerry DeFilippo: ISSA CPT- CPPS, AAPS. Founder/Owner: Challenger Strength. Archives
October 2020
Categories
All
|
 RSS Feed